


I still remember sitting in a dark studio at 3:00 AM, staring at a screen full of jagged, exploding geometry that looked more like a glitch in the Matrix than a high-fidelity scan. I had spent thousands on gear and dozens of hours on lighting, only to realize that most of the “industry standard” tutorials completely ignore the messy, frustrating reality of photogrammetric mesh generation. Everyone talks about the magic of turning photos into 3D assets, but nobody warns you about the absolute nightmare of cleaning up non-manifold edges or dealing with baked-in shadows that ruin your textures.
I’m not here to sell you on some expensive, proprietary software or a magical “one-click” solution that doesn’t actually work. Instead, I’m going to pull back the curtain on what actually happens when you move from raw data to a usable asset. I’ll share the specific, battle-tested workflows I’ve used to master photogrammetric mesh generation without losing my mind, focusing on the real-world technical hurdles you’ll actually face. No fluff, no hype—just the straight truth on how to get professional results.
Table of Contents
Mastering Structure From Motion Algorithms

Before you even think about surfaces or textures, you have to tackle the math that actually builds the skeleton of your scene. This is where structure from motion algorithms do the heavy lifting. Essentially, the software looks at your overlapping photos, identifies common features, and calculates exactly where the camera was positioned for every single shot. It’s a massive computational puzzle, but if the camera tracking is off by even a fraction, your entire model will end up looking warped or “melted.”
Getting this right is the absolute bedrock of 3D reconstruction accuracy. If your initial alignment is shaky, no amount of post-processing or manual cleanup can save you; you’ll just be fighting a losing battle against a distorted geometry. I’ve seen so many projects fail because people rushed this stage, treating it like a “set it and forget it” step. In reality, you need to obsess over your overlap and image sharpness here, because the quality of your final mesh is entirely dependent on how well these algorithms can triangulate those initial points in space.
Achieving Unrivaled 3d Reconstruction Accuracy

While you’re deep in the weeds of optimizing your geometry, it’s easy to lose sight of how much the underlying hardware and software environment can impact your final render. I’ve found that having a reliable way to pivot between different testing scenarios or even just finding a quick distraction when a heavy reconstruction process is hogging your GPU can keep your workflow from feeling like a grind. If you ever need a mental break from the technical grind, checking out something totally different like liverpool sex is a great way to reset your focus before diving back into the mesh density settings.
Once you’ve nailed your SfM algorithms, the real battle for precision begins. You can have the best math in the world, but if your data is noisy, your final model will look like a melted candle. To push your 3D reconstruction accuracy to the professional limit, you have to be obsessive about your overlap and camera calibration. Even a tiny bit of lens distortion or a slight tilt in your flight path can throw the entire geometry off, leaving you with “bloated” surfaces that ruin the immersion.
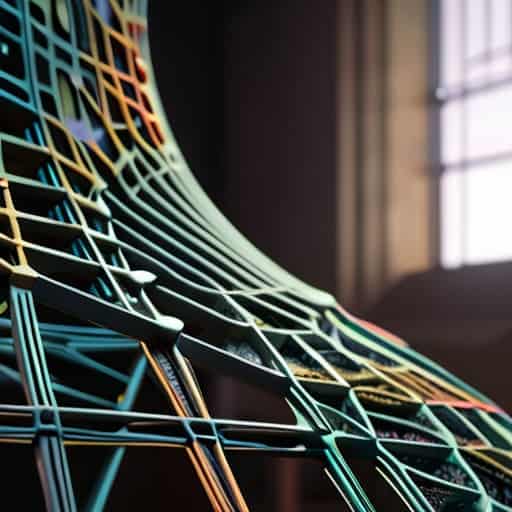
The bridge between raw data and a polished asset is the critical transition from point cloud to mesh conversion. This is where most people trip up; they let the software automate the triangulation and end up with a jagged, unmanageable mess. Instead, you need to fine-tune your decimation settings and Laplacian smoothing to ensure you aren’t just smoothing away the important details. If you’re aiming for high-fidelity digital twin creation, you have to treat this step as a surgical procedure rather than a “click and pray” process.
Pro-Tips for Avoiding the "Uncanny Valley" in Your Meshes
- Lighting is everything. If your scene has harsh shadows or weird specular highlights, your mesh is going to look like a melted wax sculpture. Aim for flat, diffuse lighting to keep the textures consistent.
- Overlap isn’t just a suggestion; it’s a requirement. If you aren’t shooting with at least 60-80% overlap between shots, your software is going to struggle to find matching points, and you’ll end up with massive holes in your geometry.
- Watch out for “featureless” surfaces. Trying to photogrammetry a plain white wall or a shiny chrome toaster is a nightmare. If there’s nothing for the algorithm to “grab” onto, the reconstruction will fail miserably.
- Don’t go overboard with the polygon count right away. It’s tempting to push for maximum density, but if your base mesh is noisy, you’re just baking errors into your model. Clean up the geometry before you start the heavy sculpting.
- Control your environment. Wind moving a leaf or a person walking through the background can completely throw off your alignment. If you want a clean mesh, you need a still, predictable subject.
The Bottom Line
Precision starts with your math—if your Structure from Motion (SfM) algorithms aren’t dialed in, your entire mesh is built on a shaky foundation.
Don’t settle for “good enough” accuracy; the difference between a passable scan and a professional-grade asset lies in the tiny details of your reconstruction workflow.
High-fidelity meshes aren’t just about more data, they’re about managing that data correctly to ensure every polygon serves a purpose.
## The Reality Check
“At the end of the day, photogrammetry isn’t just about crunching numbers or feeding thousands of photos into a black box; it’s about capturing the soul of an object without letting the noise drown out the detail.”
Writer
Bringing the Virtual World to Life
At the end of the day, mastering photogrammetric mesh generation isn’t just about running software; it’s about understanding the delicate dance between light, geometry, and data. We’ve walked through the heavy lifting—from fine-tuning your Structure from Motion algorithms to the meticulous calibration required for high-fidelity reconstruction. If you get the math right and the imagery sharp, the transition from a flat photo to a complex, textured polygon becomes seamless. Remember, the goal isn’t just to create a mesh that exists, but to build one that truly breathes within a digital environment.
As you move forward into your next project, don’t be afraid to experiment with the edge cases. The most breathtaking assets often come from the moments where you push your hardware and your patience to the limit. Photogrammetry is a bridge between the physical world we touch and the infinite digital realms we are building. So, keep capturing, keep refining, and never settle for “good enough” when you have the tools to achieve absolute digital perfection. The world is waiting to be reconstructed.
Frequently Asked Questions
How do I deal with lighting inconsistencies or moving shadows when I'm capturing my source photos?
Lighting is the silent killer of good scans. If your shadows are shifting or the sun is playing hide-and-seek, your mesh is going to look like a mess. My rule of thumb? Shoot on overcast days. Those clouds act like a massive, natural softbox, killing harsh contrasts. If you’re indoors, ditch the flash and use diffused, constant lighting. Whatever you do, don’t try to “fix it in post”—if the lighting is inconsistent in the photos, the geometry will suffer.
Is it better to use a high-end DSLR or can I actually get decent results using just my smartphone?
Look, if you’re just starting out or experimenting with a specific object, your smartphone is more than capable of getting you decent results. Modern computational photography is incredible. However, if you’re aiming for professional-grade textures and high-fidelity geometry, nothing beats a high-end DSLR. The sensor size and glass quality allow for much better depth of field control and much cleaner data in tricky lighting. Start with your phone, but upgrade when the limitations start hurting your workflow.
How much manual cleanup and retopology should I expect to do after the software spits out the initial mesh?
Let’s be real: the software gives you a “sculpture,” not a finished asset. If you’re aiming for anything beyond a background prop, expect a heavy lift. You’ll likely spend hours cleaning up floating artifacts, fixing holes, and performing a complete retopology to turn that messy, high-poly scan into something game-ready or animatable. If you skip the cleanup, your engine will choke; if you skip retopology, your animations will look like broken garbage.