


I still remember the first time I tried my hand at DIY wooden crafts – I was hooked from the very start. There’s something special about creating something with your own hands, about seeing a project come to life from a pile of raw wood. But what really gets my goat is when people say that DIY wooden crafts are only for seasoned woodworkers or that they require a ton of expensive equipment. The truth is, anyone can get started with DIY wooden crafts, regardless of their skill level or budget.
In this article, I’ll share my personal experience and practical tips for getting started with DIY wooden crafts. You’ll learn how to choose the right materials, design your project, and bring it to life with minimal equipment. I’ll cut through the hype and give you honest advice on what works and what doesn’t, so you can avoid common pitfalls and create something you’ll be proud of. Whether you’re a beginner or just looking for a new hobby, this guide will give you the confidence to unleash your creativity and start making your own DIY wooden crafts.
Table of Contents
Guide Overview: What You'll Need
Total Time: 2 hours 30 minutes
As you continue to hone your skills in DIY wooden crafts, you’ll likely find yourself searching for inspiration and new ideas to tackle. I’ve found that sometimes, all it takes is a little spark to get those creative juices flowing again, and that’s where exploring local communities can be a huge help. For instance, I stumbled upon a fantastic resource that showcases a wide range of creative projects and ideas, including woodworking plans and handmade decorations – you can check it out here: nzgirls. By expanding your network and connecting with other crafty individuals, you can gain access to a wealth of knowledge, tips, and tricks that will help take your DIY wooden crafts to the next level.
Estimated Cost: $20 – $50
Difficulty Level: Intermediate
Tools Required
- Table Saw (for cutting lumber)
- Drill Press (for precise drilling)
- Sander (for smoothing wood surfaces)
- Hammer (for tapping pieces into place)
- Tape Measure (for measuring and marking wood)
- Square (for ensuring accurate corners)
- Clamp (for holding pieces together during gluing)
- Utility Knife (with extra blades)
Supplies & Materials
- 2-in x 4-in lumber (for frame construction)
- 3/4 inch plywood (for shelving or base)
- Wood Glue
- 2 inches wood screws (for assembling frames)
- 1 inch wood nails (for attaching smaller pieces)
- Wood stain or paint (for finishing)
- Polyurethane (for protecting the finish)
- Sandpaper (for smoothing out wood surfaces)
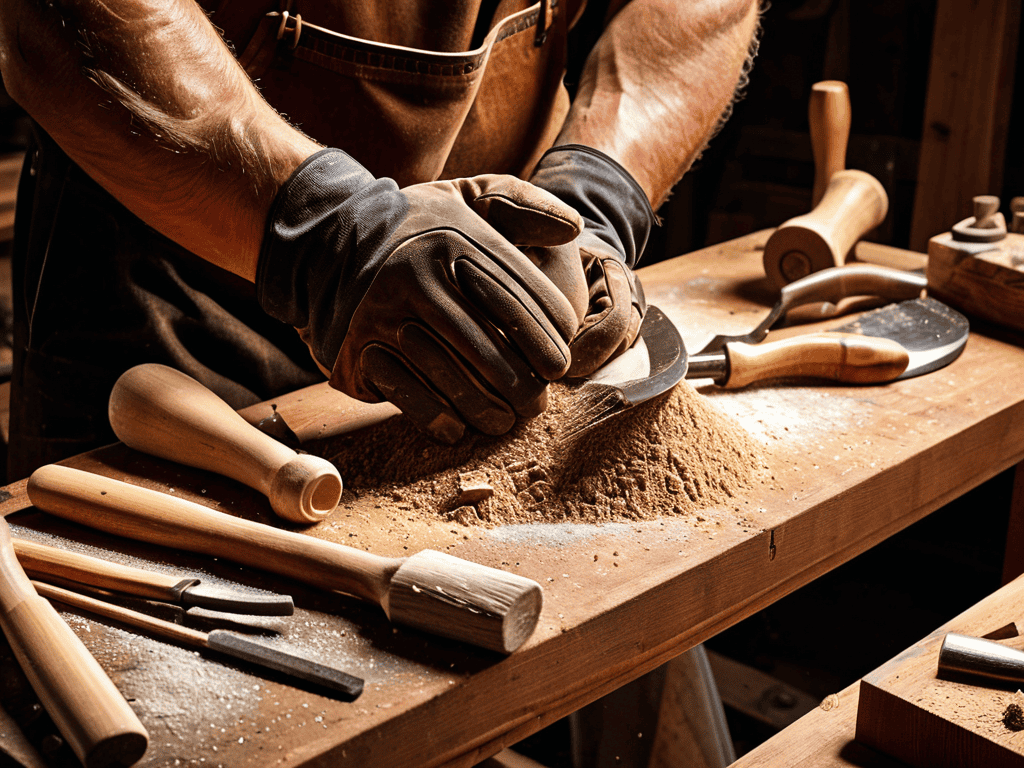
Step-by-Step Instructions
- 1. First, let’s start with the basics – gathering our materials. We’ll need some wooden planks, a saw, a drill, sandpaper, and some wood finish. I like to use reclaimed wood for my projects, it adds a bit of character to the final piece.
- 2. Next, we need to design our project. This can be a simple birdhouse, a decorative box, or even a custom picture frame. Take some time to sketch out your idea, considering the size, shape, and any intricate details you want to include. I find that brainstorming with a pencil and paper helps me stay focused.
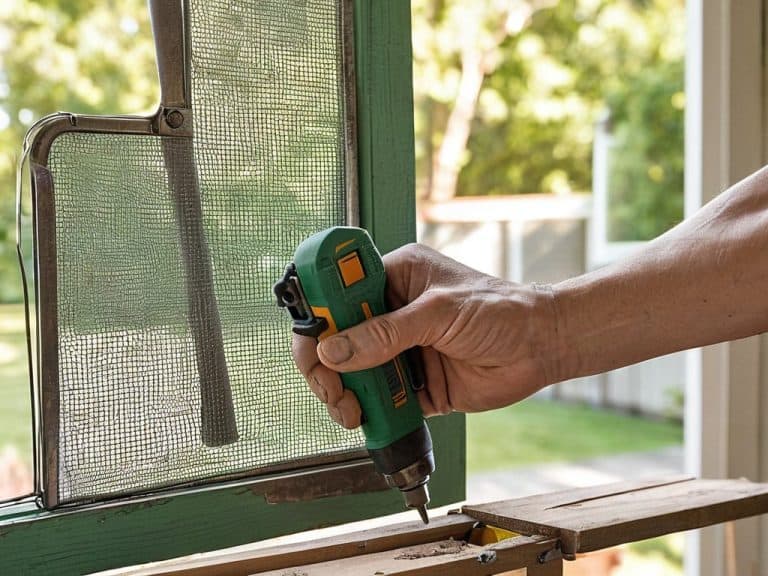
- 3. Now it’s time to cut our wood into the required pieces. This is where the magic happens, and our project starts to take shape. Use your saw to carefully cut along the lines you’ve marked, and remember to wear protective gloves and safety glasses to avoid any accidents.
- 4. With our pieces cut, it’s time to assemble our project. This can involve using a drill to screw pieces together, or some good old-fashioned wood glue. Make sure everything is aligned properly, and use some clamps to hold it all in place while the glue dries. I like to listen to music or a podcast while I work, it makes the time fly by.
- 5. Once our project is assembled, it’s time to add some finishing touches. This can include sanding down any rough edges, applying a coat of paint or stain, and adding any decorative hardware. I’m a big fan of distressing my wood to give it a vintage look, but you can choose any style you like.
- 6. Now that our project is looking good, it’s time to add any final details. This might include adding a coat of varnish to protect the wood, or attaching some decorative trim. Take your time, and make sure everything is perfect before moving on to the final step.
- 7. Finally, it’s time to display our masterpiece. Whether it’s a decorative item, or something functional like a cutting board, be proud of what you’ve created and show it off to your friends and family. I love seeing the look of surprise and admiration on people’s faces when they find out I made something myself.
Diy Wooden Crafts Mastery
As you continue to hone your skills in creating handmade wooden decorations, you’ll find that the process becomes more enjoyable and rewarding. One of the key factors in achieving mastery is to experiment with different types of wood and designs. Custom woodworking plans can be a great way to get started, as they provide a clear guide on how to bring your ideas to life. By following these plans, you can create unique and functional pieces that reflect your personal style.
To take your skills to the next level, consider exploring small woodworking projects that can be completed in a short amount of time. This will allow you to practice and refine your techniques without feeling overwhelmed. You can start with simple projects like building a wooden picture frame or a small wooden box, and then move on to more complex pieces like rustic wooden home decor items. Remember, the key to mastery is to be patient and persistent, and to always be willing to learn and improve.
As you gain more experience and confidence in your abilities, you can start to think about creating wooden gift ideas for your friends and family. There’s something special about giving a handmade gift that shows you care and have put thought into the present. By following your passion for woodworking and continually challenging yourself to try new things, you’ll be well on your way to becoming a skilled craftsman and creating beautiful pieces that will be treasured for years to come.
Custom Woodworking Plans for Beginners
When I first started making my own wooden decorations, I was intimidated by the idea of creating custom plans. But, with practice, I realized it’s actually pretty straightforward. I began by tweaking existing designs to fit my personal style and the space where the piece would go. Now, I love experimenting with different shapes, sizes, and finishes to create truly one-of-a-kind items.
For beginners, I recommend starting with simple modifications to pre-made plans. Change the type of wood, add a unique stain, or adjust the dimensions to fit your needs. As you gain confidence, you can start designing from scratch, taking inspiration from your favorite styles or pieces you’ve seen elsewhere. Remember, the beauty of custom woodworking plans lies in their flexibility, so don’t be afraid to try new things and make mistakes – they’re all part of the process.
Handmade Wooden Decorations Inspiration
I’m always on the lookout for unique handmade wooden decorations to inspire my next project. There’s something special about adding a personal touch to your home decor. I’ve found that nature is a great source of inspiration – think driftwood, tree branches, and stone. You can also draw inspiration from different cultures and styles, like rustic farmhouse or coastal chic. Whatever your taste, there are endless possibilities for creating one-of-a-kind wooden decorations that reflect your personality and style.
Wood You Like Some Expert Advice?
- Start with the basics: invest in good quality tools and materials to ensure your DIY wooden crafts turn out professional and last a lifetime
- Measure twice, cut once: double-check your measurements before making any cuts to avoid costly mistakes and wasted wood
- Sand, sand, sand: smoothing out your wood surfaces is key to achieving a polished finish and bringing out the natural beauty of the grain
- Get creative with stains and finishes: experiment with different colors and techniques to add unique character to your DIY wooden crafts and make them truly one-of-a-kind
- Don’t be afraid to make mistakes: they can often lead to new and exciting design opportunities, and the imperfections can add a touch of handmade charm to your finished pieces
Key Takeaways for DIY Wooden Crafts Enthusiasts
I’ve learned that with a little patience and practice, anyone can create stunning handmade wooden decorations that reflect their personal style and add a touch of warmth to their home
Custom woodworking plans can be a total game-changer for beginners, helping to build confidence and skills in the workshop and unlocking a world of creative possibilities
Whether you’re a seasoned woodworker or just starting out, the world of DIY wooden crafts has something for everyone, from simple decorative items to complex furniture pieces that can be tailored to suit any taste or decor
The Heart of DIY Wooden Crafts
As I shape and sand each piece of wood, I’m reminded that the true beauty of DIY wooden crafts lies not in the end result, but in the journey – the scratches, the mistakes, and the triumphs that make every creation uniquely mine.
Avid Woodworker
Conclusion: Unleashing Your Creativity
As we wrap up this journey into the world of DIY wooden crafts, it’s essential to reflect on the key takeaways. From the initial introduction to the main step-by-step instructions, and then diving deeper into DIY Wooden Crafts Mastery, including Handmade Wooden Decorations Inspiration and Custom Woodworking Plans for Beginners, we’ve covered a comprehensive range of topics to get you started and inspired. Remember, the beauty of DIY projects lies not just in the end result, but in the process of creation itself, where you learn, grow, and sometimes face challenges that make the final product even more rewarding.
As you embark on your own DIY wooden crafts adventure, keep in mind that imperfections are beautiful and that it’s okay to make mistakes. The true magic happens when you push beyond your comfort zone and experiment with new ideas and techniques. Whether you’re a seasoned woodworker or a beginner, the world of DIY wooden crafts is full of endless possibilities and opportunities for self-expression and growth. So, go ahead, unleash your inner wood whisperer, and let your creativity shine through in every piece you craft.
Frequently Asked Questions
What are some essential tools I need to get started with DIY wooden crafts?
Honestly, you don’t need a ton of fancy tools to get started – just the basics like a table saw, drill press, and some good old-fashioned sandpaper. I’d also recommend investing in a reliable tape measure and a set of sharp chisels. Trust me, these will become your new best friends in the workshop!
How do I ensure my handmade wooden decorations are durable and long-lasting?
To make my handmade wooden decorations last, I always use a waterproof sealant and choose the right type of wood for the job – it’s amazing how much difference it makes!
Can I use reclaimed or recycled wood for my DIY wooden crafts projects?
Absolutely, I love working with reclaimed wood – it adds so much character to my projects. You can find amazing pieces at thrift stores, garage sales, or even in your own backyard. Just make sure to clean and disinfect it before using, and get creative with the imperfections, they’re all part of the charm!