


I still remember the first time I tried to make a DIY wreath for my front door – it was a disaster. I had envisioned a beautiful, rustic masterpiece that would welcome guests to my home, but what I ended up with was a messy, tangled mess of twigs and ribbons. I had followed all the instructions, but somehow, it just didn’t turn out as expected. If you’re like me and have struggled with how to make a DIY wreath for your front door, you know how frustrating it can be. But don’t worry, I’ve learned from my mistakes, and I’m here to guide you through the process of creating a stunning DIY wreath that will make your front door the envy of the neighborhood.
In this article, I’ll share my honest, no-fuss approach to making a DIY wreath for your front door. You won’t find any complicated instructions or expensive materials here – just simple, practical advice on how to make a DIY wreath for your front door that looks amazing. I’ll walk you through the steps, from choosing the right materials to adding the perfect finishing touches. By the end of this article, you’ll have the confidence to create your own unique DIY wreath that reflects your personal style and adds a touch of warmth to your home. So, let’s get started and make a beautiful DIY wreath for your front door!
Table of Contents
Guide Overview: What You'll Need

Total Time: 1 hour 45 minutes
Estimated Cost: $20 – $40
Difficulty Level: Easy
Tools Required
- Wire cutters (for cutting floral wire)
- Hot glue gun (with extra glue sticks)
- Scissors (for cutting ribbon or fabric)
- Measuring tape (for measuring the wreath frame)
- Pliers (for shaping and bending wire)
Supplies & Materials
- Evergreen branches (fresh or artificial)
- Wreath frame (made of wire or foam, approximately 8 inches in diameter)
- Floral wire (in green or brown color)
- Decorative items (such as pinecones, ribbons, or ornaments)
- Glue sticks (for hot glue gun)
- Ribbon or twine (for hanging the wreath, approximately 2 feet in length)
Step-by-Step Instructions
- 1. First, let’s start by gathering all the necessary materials for our DIY wreath, including a wire or foam wreath frame, some evergreen branches, floral wire, and any decorative items you like, such as ribbons, pinecones, or holly berries. Make sure you have a clear workspace to lay out all your materials and get creative.
- 2. Next, begin by preparing your evergreen branches, cutting them into manageable pieces and stripping any excess leaves from the stems. This will make it easier to attach them to the wreath frame using floral wire. Remember to leave some variation in the length and fullness of the branches to create a more natural look.
- 3. Now, start attaching the evergreen branches to the wreath frame, beginning at the bottom and working your way up. Use the floral wire to securely tie the stems to the frame, overlapping the branches slightly as you go to cover any gaps. Don’t be afraid to experiment with different patterns and densities to achieve the desired fullness and texture.
- 4. With the basic structure of your wreath in place, it’s time to add some decorative elements. Cut a length of ribbon or twine and tie it around the top of the wreath frame, leaving a small loop for hanging. You can also use this opportunity to add any other decorations, such as pinecones, holly berries, or ornamental bows, using floral wire or hot glue to secure them.
- 5. To add some extra depth and interest to your wreath, consider incorporating some other natural elements, such as dried flowers, seed pods, or fragrant herbs like rosemary or thyme. Simply tie or glue these elements into place, arranging them in a way that looks balanced and visually appealing.
- 6. As you near the completion of your DIY wreath, take a step back to evaluate its overall appearance. Make any necessary adjustments to the placement of the branches or decorative elements, and fluff out any areas that look a bit flat. Remember, the key to a beautiful wreath is balance and harmony, so don’t be afraid to make changes until you’re happy with the result.
- 7. Finally, hang your finished wreath on your front door and stand back to admire your handiwork. With proper care, your DIY wreath should last throughout the season, providing a warm and welcoming touch to your home’s exterior. To keep it looking its best, simply mist it with water occasionally to prevent the evergreen branches from drying out.
Craft Your Entry

As you’re getting ready to add the final touches to your DIY wreath, don’t forget to think about the overall aesthetic you want to achieve for your front door. A beautiful wreath can really make your entryway stand out, and with a little creativity, you can create a look that’s both welcoming and uniquely yours. If you’re looking for some inspiration or want to explore other DIY projects to complement your new wreath, I recommend checking out the resources available at transensex, where you can find a wealth of information on home decor and crafting ideas to help you take your DIY skills to the next level.
As you craft your entry, consider the overall aesthetic you want to achieve with your DIY wreath. Think about the style of your home and the surroundings, and choose materials that complement them. For a winter wonderland feel, you could opt for an evergreen wreath making approach, using fresh or artificial fir branches to create a lush, green base. This will provide a beautiful backdrop for any additional decorations you want to add.
When it comes to adding some personality to your wreath, don’t be afraid to get creative with seasonal flower arrangement. You could use fresh flowers, dried blooms, or even artificial ones in a variety of colors and textures to create a unique look. Consider using upcycled wreath materials like old ribbons, burlap, or lace to add some extra charm. This will not only make your wreath more eco-friendly but also give it a one-of-a-kind touch.
To take your front door decor to the next level, look for front door decor inspiration online or in magazines. You could find ideas for winter wreath ideas that incorporate natural elements like pinecones, holly, or mistletoe. Alternatively, you could experiment with diy wreath forms using wire to create a more modern, sleek design. Whatever you choose, remember to have fun and make it your own – after all, that’s the beauty of DIY!
Evergreen Wreath Making Simplified
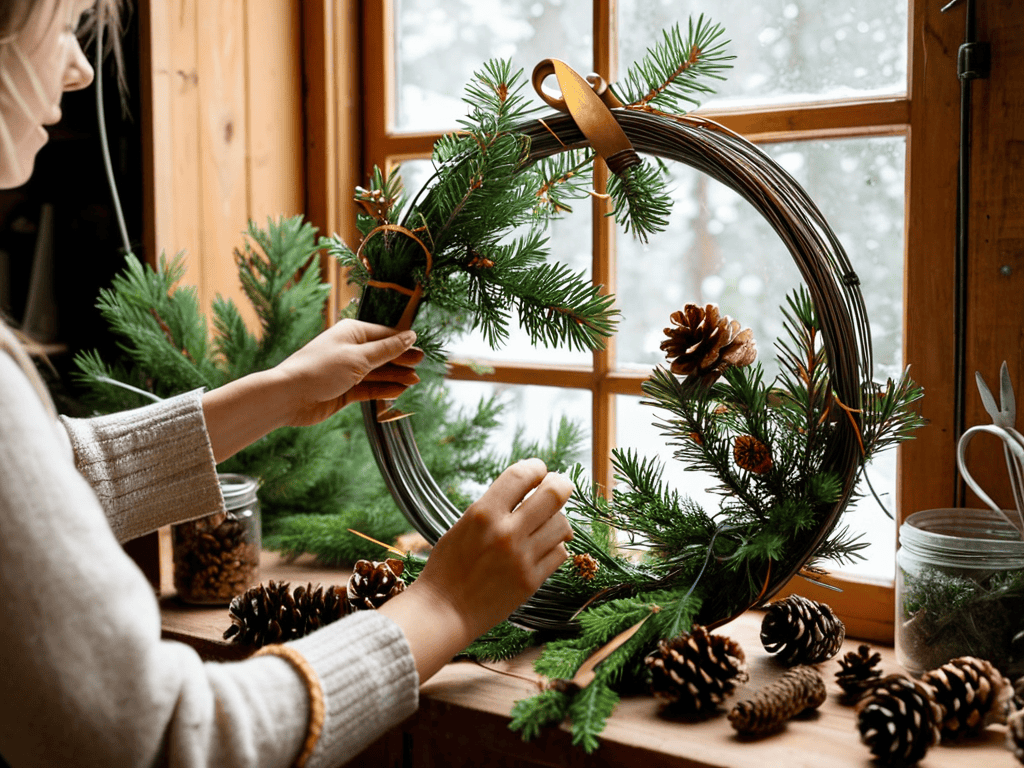
To create a stunning evergreen wreath, start by gathering an assortment of fresh or artificial evergreen branches, along with some decorative items like pinecones, ribbons, or bows. You can also add some seasonal flowers or berries to give it a pop of color. Begin by forming a circular base with the evergreen branches, securing them together with wire or a hot glue gun. This will provide the foundation for your wreath, allowing you to build upon it with your chosen decorations.
Keep your design simple or go all out – the beauty of evergreen wreath making lies in its versatility. You can opt for a minimalist look or create a more elaborate piece, depending on your personal style and the theme of your entryway.
Winter Wreath Ideas to Inspire
As the seasons change, so can your wreath. Winter brings a serene beauty to our doorsteps, and your wreath can reflect that. Consider using natural elements like pinecones, frosted glass ornaments, or eucalyptus to create a frosty ambiance. You can also play with textures by incorporating wool, burlap, or velvet ribbons to add depth and coziness.
For a more dramatic look, try a monochromatic color scheme featuring icy blues and silvers, or rich reds and greens. You can also draw inspiration from winter activities like skiing or ice skating, and incorporate elements that evoke a sense of fun and playfulness. Whatever your style, a winter wreath is the perfect way to welcome the season and add some festive charm to your front door.
5 Essential Tips to Elevate Your DIY Wreath Game
- Choose a theme or color scheme that complements your home’s exterior and the current season to ensure your wreath looks intentional and inviting
- Select high-quality materials that can withstand various weather conditions, such as durable flowers, greenery, or decorative elements
- Experiment with different textures and shapes to add depth and visual interest to your wreath, from ribbons and bows to pinecones and ornaments
- Don’t be afraid to get creative and incorporate personal or sentimental items into your wreath design, like family photos, heirlooms, or handmade decorations
- Consider the size and scale of your wreath in relation to your front door and surrounding decor, ensuring it’s proportional and balanced to create a warm and welcoming atmosphere
Key Takeaways for Your Perfect DIY Wreath
With a few simple steps and materials, you can create a beautiful and welcoming DIY wreath for your front door that reflects your personal style
Don’t be afraid to experiment with different themes and materials, such as evergreen branches, ribbons, and decorative items, to create a unique and seasonal wreath
Remember, the key to a stunning DIY wreath is to have fun and be creative, so don’t hesitate to try new things and make it your own
A Creative Expression
As you weave together the elements of your DIY wreath, remember that it’s not just about the materials, it’s about the story you want to tell at your front door – a story of warmth, welcome, and the beauty of the everyday.
Emily Wilson
Finishing Touches: Bringing Your DIY Wreath to Life

As we’ve explored the world of DIY wreath making for your front door, it’s clear that the process is not just about following steps, but about injecting your personality into every detail. From the initial planning to the final touches, crafting a beautiful wreath requires patience, creativity, and a willingness to experiment. We’ve delved into the basics of wreath construction, discovered how to elevate your entryway with seasonal themes, and even simplified the process of creating an evergreen wreath. Each of these elements contributes to a unique piece that reflects your style and welcomes visitors to your home.
As you hang your finished DIY wreath on your front door, remember that it’s more than just a decorative piece – it’s a reflection of you. The time and effort you’ve put into bringing your vision to life is what makes it truly special. So, don’t be afraid to get creative, try new things, and make mistakes. It’s all part of the journey to creating a beautiful, one-of-a-kind DIY wreath that makes your home feel even more like your own.
Frequently Asked Questions
What type of materials are best to use for a DIY wreath to ensure it lasts throughout the seasons?
For a long-lasting DIY wreath, choose materials that can withstand the elements. I recommend using durable bases like wire or grapevine, and decorating with high-quality, weather-resistant items like pinecones, ribbons, and artificial flowers. These will help your wreath stay beautiful throughout the seasons.
How do I attach decorations to my wreath without damaging the base or the ornaments?
To attach decorations without damaging your wreath, use a hot glue gun for heavier items or floral wire for lighter ones. You can also use decorative pins or wire picks for a more rustic look. Gently wrap ribbon or twine around the base for a softer touch, ensuring your beautiful wreath remains intact.
What are some creative ways to repurpose or upcycle old items to incorporate into my DIY wreath?
Get creative with old items like vintage doors, windows, or even mason jars to add a unique twist to your wreath. You can also repurpose natural elements like pinecones, twigs, or seashells to give it a personal touch. Think outside the box and breathe new life into old treasures!